If you are not an avid seamstress…
sometimes pulling out the sewing machine can
seem…
well, a bit intimidating.
It’s one of those humps, that unless you have
someone helping you along, may seem impossible to get over.
Learning to sew on your own can be a lot of
trial and error.
This is me, trying to
help ease some of that sewing grief.
Some of the biggest mistakes people make are also the most
simple to remedy, but unless you know you are making them, then how can you remedy
them?
There is only ONE way to set up a
sewing machine.
If you do it wrong, it
can mess up the whole project and leave you feeling very flustered.
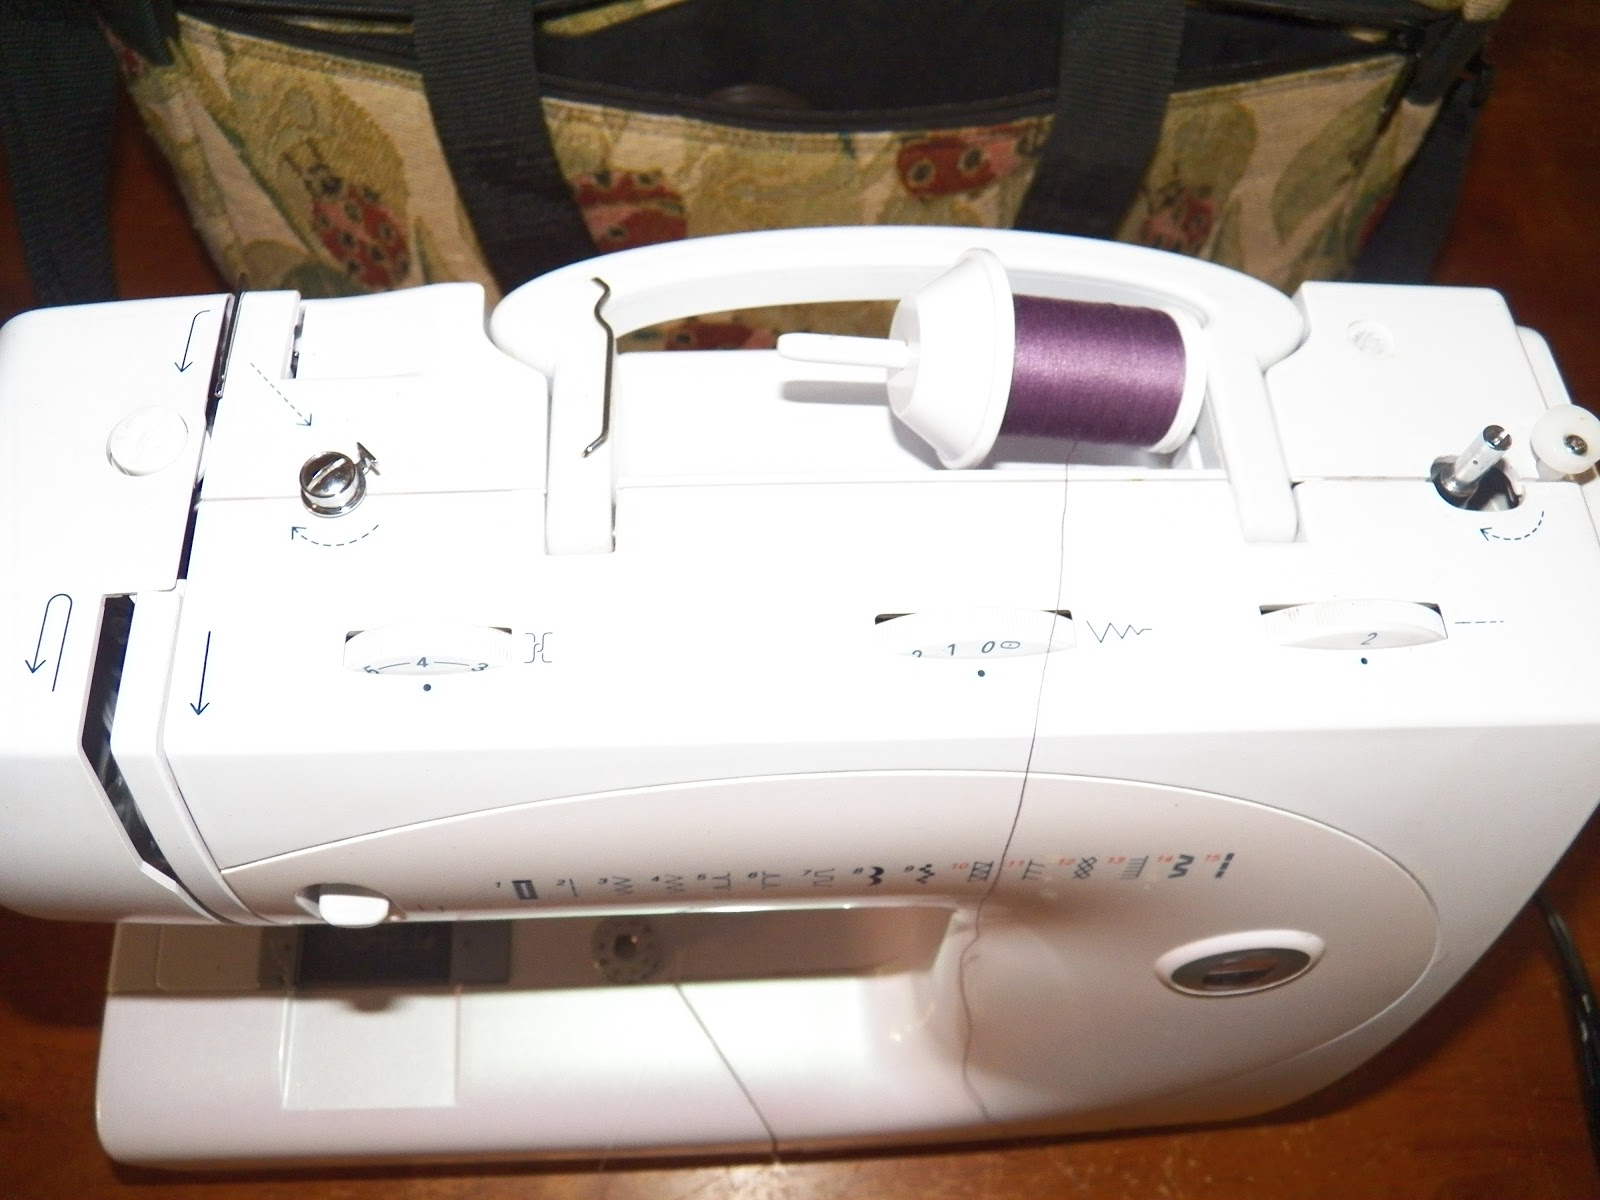
This is how pretty much all machines look to some degree. Everybody's is a little different, but they all have the same parts and pieces.
The first step is to understand that everything in the sewing
machine needs to go counter-clockwise.
The thread, the bobbin… all of it
needs to be so that when it is used, it is turning in a counter-clockwise
direction.
Always hold tension on your thread with one hand, while
threading the machine with the other. When
the thread is in place, you should hear a soft click. That means that the tread is secured properly
inside the machine which in turn will help it sew properly. Don’t hold it hard, but hold it firmly. After it is threaded, you should be able to
pull on the thread and feel some sort of resistance on it from the machine. That is what you want.
So, always counter-clockwise… and feel for the tension.
When making a simple straight stitch, the most common length
to use is a 2. 1 will be too short, and
4 will be way to long. Test is out on a
test strip of cloth first if you are still unsure.
The width when making a straight stitch is good at a 0. You don’t want any up or down movement
here. So, leave that at a 0.
 |
| The first dial on the left is for the tension in the material. On my machine, setting it on 4 is perfect for normal thickness. Some machines may have an "auto" option. The middle dial is for width of stitch up and down. For a normal straight stitch, this should be set at "0." The dial on the right is the length of the stitch. For a normal stitch, a "2" is perfect. |
When you thread the bobbin, use the same techniques.
Counter-clockwise and hold tension.
 |
| Step 1- Push on bobbin to hold tension, take thread to the right. |
 |
| Step 2- Slide thread through bobbin compartment to the left. |
 |
| Step 3- Pull thread to back of machine and it will pop into place. |
 |
| Step 4- Turn the wheel towards you while holding the thread | . |
After the bobbin is threaded into the machine, pull the
wheel towards you to bring the needle down.
That will catch the bobbin underneath and pull the thread up.
And now your sewing machine is ready to go!
Next, set up a sewing kit!


No comments:
Post a Comment